


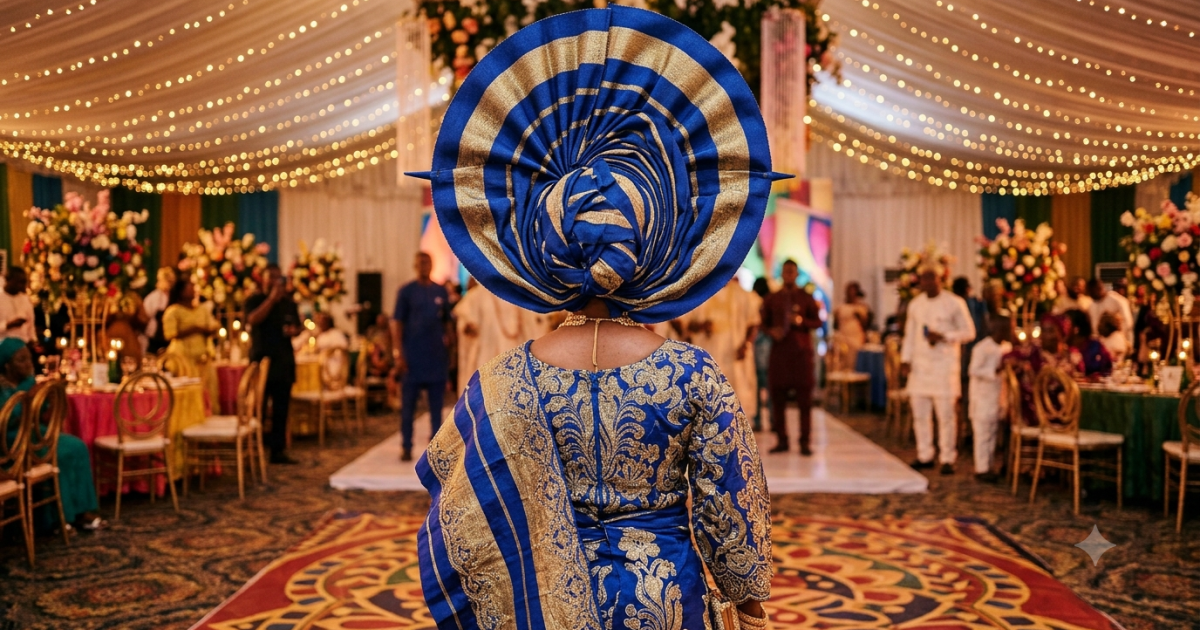
📌 Quick Summary: Gele is a Nigerian head wrap made from stiff fabric — aso-oke, Guinea brocade, or similar — tied around the head in decorative folds and pleats. Learning to tie gele takes 15 to 30 minutes of practice per day for approximately 1 to 2 weeks. The four essentials are: the right fabric (stiff, not soft), the correct placement (2 fingers above the hairline), the anchor fold (your foundation), and the fan (your showpiece). This guide covers the complete beginner method Step by Step, how to choose the right fabric, the difference between tied gele and auto-gele, common mistakes, and how to practice at home before your next owambe.
Walk into any Nigerian owambe — any wedding, naming ceremony, burial, or traditional event — and the first thing that will catch your eye is the gele. Towering, sculpted, perfectly symmetrical fans of fabric rising from women’s heads in every colour the market sells. The gele is not merely an accessory in Nigerian culture. It is a statement — of elegance, effort, and belonging. For many Nigerian women, it is also a source of quiet anxiety: the knowledge that gele-tying is a skill they have not yet mastered, that they depend on a professional tier-woman before every important event, that they have occasionally arrived at an owambe with a lopsided gele that came undone before the first plate of jollof rice arrived. This guide changes that.
What Is Gele? The Fabric and the Tradition
Gele (pronounced “geh-leh”) is the Yoruba word for a head wrap worn by women at formal occasions — particularly weddings, naming ceremonies, and owambe events. It is part of the iro and buba ensemble that constitutes traditional Yoruba formal attire, though gele is worn across all Nigerian ethnic groups. The fabric used for gele is specifically chosen for its stiffness — it must hold the elaborate folds and fan structures that define a properly tied gele. The most prestigious gele fabric is aso-oke (woven by Yoruba craftspeople on narrow looms in traditional patterns), followed by Guinea brocade, Miliki, and Swiss lace fabrics stiffened for head-tying. Soft fabrics — cotton, regular ankara, chiffon — cannot hold gele shapes and should not be used for formal gele tying.
What You Need Before You Start
| Item | Details |
| Gele fabric | Minimum 2 yards (72 inches/183cm) for a standard gele. 2.5 to 3 yards for a larger, more elaborate fan. Buy aso-oke or Guinea brocade from a fabric market — tell the seller you want fabric for gele tying and they will guide you to appropriate stiffness. |
| Inner lining or stocking cap | A plain black or nude stocking cap or hair net worn before the gele. This gives the gele something to grip and prevents it slipping on natural hair or wigs. Non-negotiable — tying gele without an inner base causes it to slip and loosen. |
| Bobby pins (kirby grips) | 6 to 10 for securing the folds. The larger, sturdier type — not mini hair pins. |
| Mirror | A large mirror or, better, a hand mirror plus a wall mirror so you can see both the front and back of your head simultaneously. |
| Practice | Your own head. You will make mistakes. That is how gele is learned. |
Understanding the Structure of a Gele
Before tying, understand what you are building. A properly tied gele has four structural components. The band: the fabric wrapped around the circumference of the head — this is the foundation and must be tight enough to stay up but not so tight it causes a headache. The anchor fold: the first fold at the front of the head that sets the shape and prevents the gele from sliding back. The body: the wrapped sections on the sides of the head that give the gele its height and volume. The fan: the dramatic pleated or folded section at the back or top that is the visual centrepiece of the whole structure.
Step-by-Step: How to Tie a Basic Nigerian Gele
Step 1: Put On Your Stocking Cap
Place the stocking cap over your hair, pulling it down to about 2 fingerwidths above your hairline all around. The cap should be snug but not tight. This is your grip layer — without it, the gele will slide.
Step 2: Find the Centre of Your Fabric
Fold your gele fabric in half lengthwise so it becomes a long, narrower strip. Alternatively, some gele fabrics come pre-folded. You will be working with this folded strip throughout. Find the midpoint of the strip — this is where the centre front of the gele will be.
Step 3: Place the Fabric on Your Head
Hold the fabric at its midpoint and place it at the centre of your forehead — approximately 2 fingerwidths above your hairline. This positioning is critical: too low and the gele sits on your face; too high and the front looks bare and exposing. The fabric should run horizontally across your forehead, with equal lengths hanging down on both sides.
Step 4: Create the Anchor Fold at the Front
Fold the front edge of the fabric (the edge closest to your face) back and upward once, creating a clean, firm fold that sits against your forehead. This fold is your anchor — it prevents the gele from sliding backward throughout the evening. Secure the anchor fold with 2 bobby pins hidden in the fold. This front anchor is the single most important structural element of the gele.
Step 5: Wrap Both Ends Around to the Back
Take the right side of the fabric and wrap it around the right side of your head toward the back. Take the left side and wrap it around the left side toward the back. The two ends should meet at the back of your head. Cross them over each other and bring each end back toward the front — right end going left, left end going right — creating a crossed wrap that holds the band tight around your head. Tuck or tie the ends temporarily at the front so they do not unravel while you work on the fan.
Step 6: Create the Fan (The Showpiece)
This is the step most beginners find hardest and most rewarding when it works. Take the longer of your two remaining fabric ends (the end with the most material left). Begin making accordion-style pleats — fold a section of fabric forward, then backward, then forward again in equal widths of approximately 3 to 5 centimetres per pleat. Continue until the remaining fabric is fully pleated into a fan shape. Hold the pleated fan firmly at its base. Position it at the back or side of your head — most traditional gele fans sit at the back right. Secure the base of the fan tightly with 3 to 4 bobby pins pushed through all the pleats and into the gele underneath.
Step 7: Shape and Adjust
Stand back and look at your gele in the mirror — front, side, and back. The band should be even around your head with no visible gaps or bumps. The fan should be symmetrical and secure. The front anchor should be clean and straight. Adjust any uneven sections by tucking or refolding. Add additional bobby pins wherever the gele feels loose. The finished gele should feel secure enough that shaking your head does not move it.
Auto-Gele: The Modern Alternative
Auto-gele (also called pre-tied gele or ready-made gele) is a gele that has already been shaped, pleated, and structured by a professional, with an elastic band or zip at the back that allows it to be worn like a hat rather than tied from scratch. Auto-gele emerged in Nigerian fashion markets approximately 10 years ago and has become extremely popular — particularly for women who attend owambes frequently and want consistent results without depending on a tier-woman. The quality of auto-gele ranges from ₦3,000 roadside versions that look exactly like what they are, to ₦15,000–₦30,000 professionally structured pieces made from high-quality aso-oke that are virtually indistinguishable from hand-tied gele in photographs. Auto-gele is not “cheating” — it is a practical solution that many prominent Nigerian women use openly.
Gele Tying for Different Face Shapes
The fan placement and height of a gele can be adjusted to flatter different face shapes. For round faces: a taller, more vertical fan adds height and elongates the face — avoid wide, flat fans that broaden the appearance. For long faces: a wider, more horizontal fan balances the length — avoid very tall fans that make a long face appear even longer. For square faces: a soft, rounded fan shape softens angular jaw lines — avoid very structured, geometric fan shapes. For oval faces: most gele styles flatter this face shape — you have the most flexibility in fan placement and style.
How Long Does It Take to Learn Gele Tying?
With 15 to 30 minutes of practice per day, most women tie a presentable basic gele within 1 to 2 weeks. The anchor fold and the fan are the two elements that require the most repetition — practice them separately before combining into a full gele. Record yourself on video while practicing — it is much easier to spot uneven placement and lopsided fans from video than from a mirror. Practice on a mannequin head if available — it removes the physical awkwardness of working on your own head and lets you see the structure more clearly.
Frequently Asked Questions
What fabric is best for gele tying?
Aso-oke is the most prestigious and holds its shape best. Guinea brocade (also called Miliki) is widely used and widely available. Both are stiff enough to hold the folds and fan that define a proper gele. Avoid soft fabrics like regular cotton, ankara, or chiffon — they cannot maintain gele structure.
How much gele fabric do I need?
Minimum 2 yards (approximately 183cm) for a standard gele. 2.5 to 3 yards for a larger fan. Buy the longer length if in doubt — excess fabric gives you more to work with for the fan, and a more generous fan looks more impressive.
How do I stop my gele from falling off?
Three things: wear a stocking cap underneath (provides grip), create a tight anchor fold at the front (prevents backward sliding), and use enough bobby pins (at least 6 to 8 total, concentrated at the anchor fold and fan base).
What is the difference between gele and auto-gele?
Gele is tied from scratch using a length of fabric, requiring skill and practice. Auto-gele is a pre-tied, pre-structured gele with an elastic or zip back that is put on like a hat. Auto-gele is faster, more consistent, and requires no tying skill — quality ranges from very obvious to nearly indistinguishable from hand-tied at higher price points.
How do I learn to tie gele faster?
Practice daily for short sessions (15 to 30 minutes) rather than occasional long sessions. Focus on the anchor fold first — get that right before worrying about the fan. Record yourself and review the video. Watch professional Nigerian gele tiers on YouTube to study hand movements and positioning. Practice on a mannequin head if available.
Sources
- Original instructional content — NaijaSabi Lifestyle Desk, September 2026
- Nigerian fashion tradition — Yoruba gele tying techniques documented across southwestern Nigerian communities
Last updated: 6 September 2026 · NaijaSabi Lifestyle Desk.
Caring for Your Gele Fabric
Aso-oke and Guinea brocade gele fabrics require specific care to maintain their stiffness and appearance across multiple wears. After each use, gently remove all bobby pins and allow the fabric to naturally relax from its tied shape — do not force it flat. Store rolled loosely rather than folded sharply — sharp folds along the same crease repeatedly will eventually weaken the fabric fibres. For cleaning, most aso-oke and Guinea brocade gele fabrics should be dry-cleaned rather than machine-washed — water and heat can relax the stiffness treatments applied to the fabric, reducing its ability to hold gele shapes. Some gele fabrics can be hand-washed in cold water and allowed to air dry, but test a small corner first. A fabric that has lost its stiffness after washing can often be restored by lightly starching it while still damp and allowing it to air dry — spray starch (like Robin starch spray) applied evenly and allowed to dry before the next use will firm up the fabric. A well-cared-for aso-oke gele piece can last 10 to 15 years and across dozens of owambes — making the initial investment in quality fabric worthwhile many times over.




0 Comments
No comments yet. Be the first to share your thoughts!